The Art of Editing: How to Add Professional Touches to Your Videos
The Art of Editing: How to Add Professional Touches to Your Videos
Video editing is where the magic happens. It’s the stage where raw footage transforms into a compelling narrative that engages, inspires, and drives action. While anyone can stitch clips together, it takes skill and creativity to produce a video that looks professional and polished. Whether you’re a beginner or an experienced creator, incorporating a few advanced techniques can elevate your videos and captivate your audience.
Here’s how to add professional touches to your video edits and make your content stand out.
1. Nail the Basics First
Before diving into advanced techniques, it’s essential to master the basics:
Smooth Transitions: Ensure transitions between clips are clean and seamless. Overusing flashy transitions can be distracting, so stick to simple options like cuts, fades, and dissolves.
Clean Cuts: Trim unnecessary footage to maintain a steady flow and keep your video concise.
Once you’ve mastered these fundamentals, it’s time to move on to the next level.
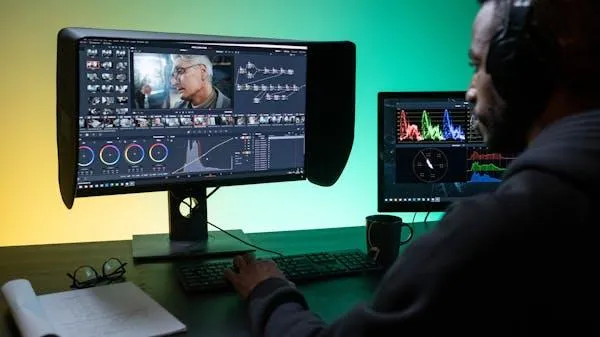
2. Color Correction and Grading
One of the most noticeable differences between amateur and professional videos is the quality of color. Raw footage often looks flat or inconsistent due to lighting changes. Color correction and grading can transform your video’s visual appeal.
Color Correction:
Adjust brightness, contrast, and white balance to ensure consistency across all clips.
Tools: Most editing software, like Adobe Premiere Pro or Final Cut Pro, has built-in color correction features.
Color Grading:
Use color to evoke emotion and set the tone. For example, warm tones can create a nostalgic feel, while cooler tones can add a sense of calm or mystery.
Tools: LUTs (Look-Up Tables) are a great way to apply pre-set color styles to your footage.
3. Focus on Sound Design
Audio quality is just as important as visuals. Poor sound can ruin an otherwise excellent video, so pay attention to sound design.
Background Music:
Choose music that complements your video’s tone and pace. Ensure it doesn’t overpower the dialogue or narration.
Resources: Platforms like Artlist, Epidemic Sound, and AudioJungle offer royalty-free music.
Sound Effects:
Add subtle sound effects like whooshes, clicks, or ambient noise to enhance realism and immersion.
Dialogue Clarity:
Use tools to reduce background noise and ensure voices are clear and crisp.
Tools: Adobe Audition and Audacity are excellent for audio editing.
4. Master Timing and Pacing
The rhythm of your video significantly affects how viewers experience it. Perfecting timing and pacing ensures your content keeps viewers engaged.
Cut to the Beat:
Sync your cuts to the beats of your background music for a dynamic and cohesive flow.
Vary Pacing:
Alternate between slow and fast-paced segments to create emotional highs and lows.
5. Add Motion Graphics and Text Overlays
Motion graphics and text overlays can help communicate your message effectively while adding a professional touch.
Lower Thirds:
Use lower thirds to introduce speakers or provide additional context.
Text Animations:
Add animated titles or captions to emphasize key points.
Tools: Adobe After Effects and Canva are great for creating motion graphics.
6. Enhance with Special Effects
Special effects can add a creative flair to your videos when used thoughtfully.
Green Screen (Chroma Keying):
Replace backgrounds with custom visuals for a cinematic touch.
Speed Ramping:
Smoothly transition between fast and slow motion to emphasize specific moments.
Lens Flares and Light Leaks:
Subtle light effects can add drama or elegance to your shots.
7. Pay Attention to Aspect Ratios and Formats
Different platforms have different requirements for video formats and aspect ratios. Optimizing your edits for the platform ensures your content looks its best.
Social Media:
Vertical (9:16) for Instagram Stories, TikTok, and Reels.
Square (1:1) for Facebook and Instagram posts.
YouTube:
Horizontal (16:9) for widescreen videos.
Most editing software allows you to set the aspect ratio before starting your project.
8. Test and Iterate
Before publishing, review your video on multiple devices to ensure it looks and sounds great everywhere. Share it with a small group for feedback, and be open to making improvements.
In Conclusion
Editing is where your video comes to life. By mastering techniques like color grading, sound design, and motion graphics, you can turn ordinary footage into extraordinary content that captivates your audience. Remember, the goal is to create a seamless, immersive experience that leaves a lasting impression.
Stay tuned for the next blog, where we’ll explore strategies for creating videos that convert and drive results for your business!
